
Seriously Fun Mac and Windows Software
Seriously Fun Mac and Windows Software
Seriously Fun Mac and Windows Software
Seriously Fun Mac and Windows Software

macOS v3.1 31 May 21
Windows v3.1 29 May 21
Frame Painter for LGS
Interface Guide
Terms to know:
Frame: a pattern of lights on your keyboard. Defined by a picture with location and size, and the position and size of the keyboard overlay/mask.
Frame set: one or more frames saved together to become an animation and exportable to LGS. The right side of the main window shows the frames you’ve captured into the current frame set.
The main window contains three control areas described below. Click on a portion of the graphic to learn more:
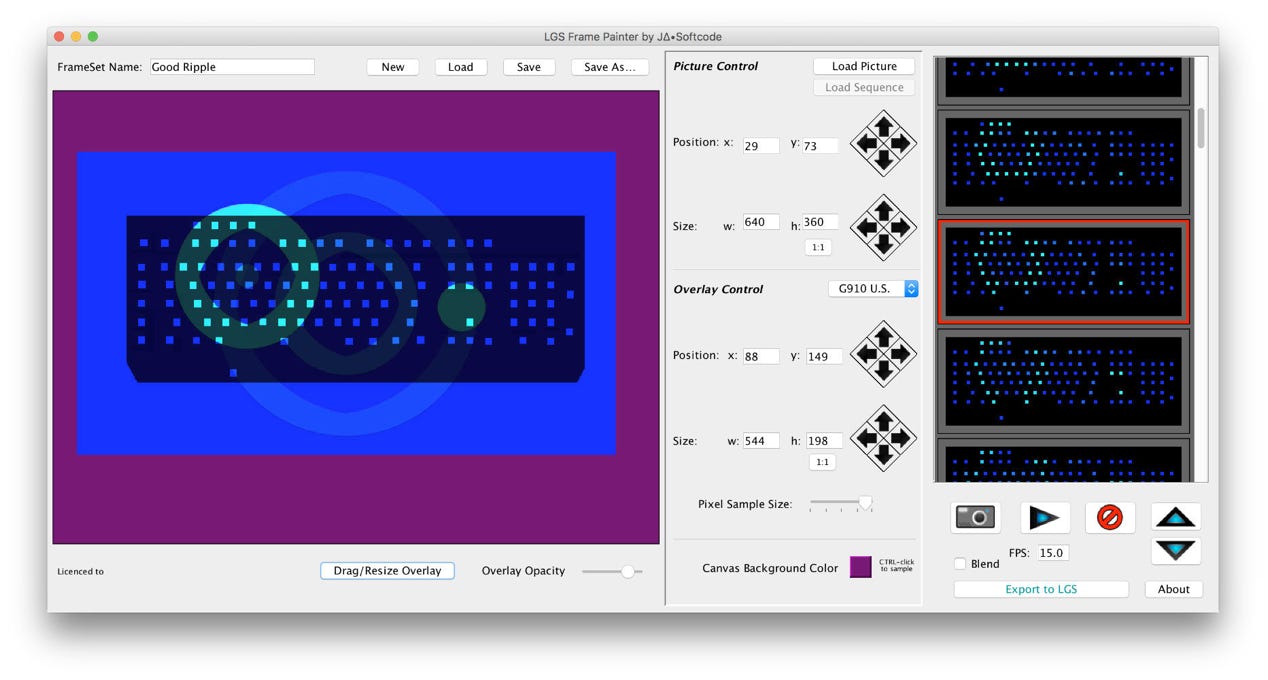
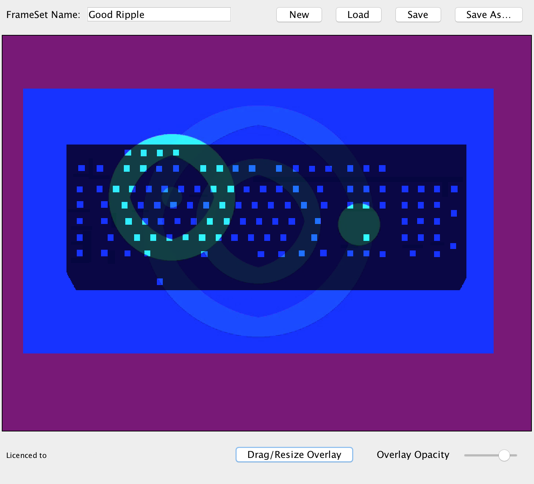
Left Panel:
Use the Canvas View to move and resize your image and a shadow image of the keyboard keys (the overlay). This is how you define a frame. As you move either the image or the overlay, the lights on your keyboard update instantly.
Move your picture around in the canvas by clicking and dragging. Click and drag in the lower-right corner of the picture to change the size and stretch.
To move and resize the keyboard overlay, click on the "Drag/Resize Overlay” button. That button will stick down. Then drag the image of the overlay. Click the button again to go back to modify the image.
Use the Overlay Opacity slider to change the transparency of the overlay layer. This is a guide for design and has no effect on how the lights appear in the frame.
In the area above the canvas, give your frame set a name. The name will be used when you save the frame set and when you export it to LGS.
Use the buttons to load, save, or start a new frame set.
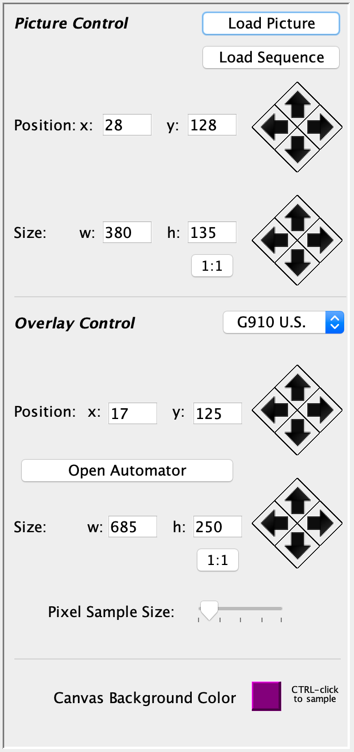
Center Panel:
The center of the interface gives precision control over image and overlay size and location.
The Load Picture button at the top will load a new image (PNG, JPG or GIF) into the canvas/frame. The new picture replaces the current picture and will appear centered in the view. However, if the loaded picture is exactly the same size as the current picture, it will keep the current picture’s location and size.
If you have many images with the same dimensions (e.g. an animation), use the Load Sequence button to read them all in at once. First, load the first image, place and size it, and capture a frame. The Load Sequence button will activate. Click it then select multiple files (holding the shift key) in the file selector window to automatically add a frame based on each image to the frame set.
The numbers and arrows in the Picture Control section show and control the exact location and size of the picture in the canvas. You can type numbers in the boxes. Click the 1:1 button to change the image height to be in proportion to the current width.
The Overlay Control section shows and controls the location and size of the keyboard overlay that defines the frame.
If you want to make an animation by scrolling and/or zooming across a single image, load the image and setup the first frame. Click the Open Automator button to open the Overlay Automator then click the “Set from current” button for the starting position. Now move and/or resize the overlay to the end of the animation you want. Click the “Set from current” button for the ending position. Enter the number of frames, or steps you want created between the starting and ending positions, and click the “Capture automated frames” button. The app will generate that number of frames moving the overlay between the start and end positions and insert those frames in the Frame Set.
Pixel Sample Size controls color blending. When it’s fully on the left, the program samples a single pixel color in the picture for each key. Moving the picture only slightly can result in rapid color fluctuation. As you move the slider to the right, more pixels around the original one get averaged together as the color for each key. This will smooth color fluctuation as you move the image. Note, the edges of the picture never blend with the background color.
Click the Canvas Background Color patch to select a new color to appear in the background beyond the edge of the picture. CTRL-click in the canvas to set the background color to the color under the pointer.


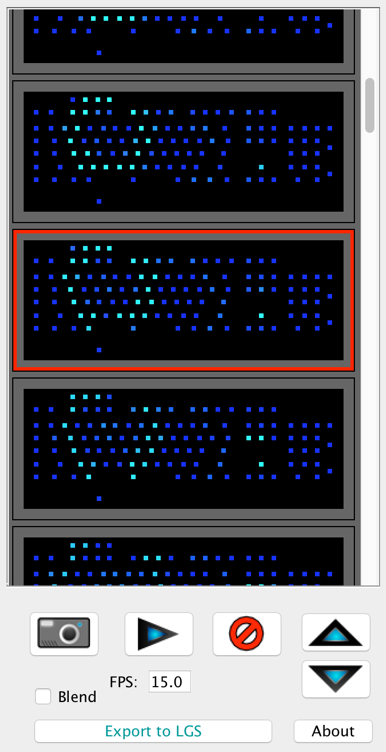
Right Panel:
On the right side of the interface is the frame set sequencer.
This large scrolling area shows the frames in the current frame set. You can add as many frames as fit in memory. Click to select a frame. The selected frame has a red box around it. Double click a frame to make the picture and overlay move and resize to match.
Click the camera button to capture the current frame on the canvas and add it into the frame set.
Click and hold the Play button to animate the frame set on your keyboard. The frames will cycle at the speed typed in the “frames per second” box.
The frame set is always exported to LGS at 5 frames per second, which is the fastest LGS allows in its editor. You can slow down some or all animation frames later by using the editor in LGS.
Click the delete button to remove the selected frame from the frame set. There is no undo.
Click the arrows to move the selected frame up or down (earlier or later) in the frame set.
Click Export to LGS to save this frame set into an .eft file you can import into LGS for the "Your Effects" editor. You must register to use this feature.
Click the Blend checkbox if you want LGS to use a smooth transition between frames, or leave it unchecked and LGS will change colors in each frame instantly.
NOTE: Frame Painter for LGS does not read the .eft files it creates so be sure to also save your frame set using the Save button above the canvas if you want to edit it again.
© 2016-2024 J∆•Softcode
© 2016-2021 J∆•Softcode